I am not a fancy photographer. I used a basic point-and-shoot camera for a long time, and even now that I have a DSLR I shoot in auto mode 99.99% of the time. If I’m away from home, I use my iPhone–no way am I gonna be lugging around a bulky camera and worrying about it getting broken the whole time. I snap a few photos and move on with my life. But I do like to think that thanks to my blog my photography skills have improved measurably, and I’m pretty confident these days that I can take a decent picture of my kid or my house. I thought it’d be fun to share some really accessible and easy-to-implement tips with y’all. You CAN take great pictures even without a fancy camera or Photoshop.
The biggest, number one, most important thing I can say is to never, ever, ever, EVER, use flash. Leave it to the professionals and their fancy bounce cards and diffusers. Even with my DSLR, flash goes very wrong, very fast. Below is a photo that I took in one of the darkest corners of my house on an overcast day. The left is with flash, the right is without.
That one on the left is BLEH, am I right? I have yet to meet a camera that didn’t have an option to turn off the flash while still shooting in auto mode. It’s usually a little lightning bolt with a line through it. On the iPhone it’s in the upper-left corner of the camera screen.
Now if you’re thinking that your photos will be too dark without flash, you might be right. Welcome to the wonderful world of photo editing. I use the basic program that came with my computer (Windows Live Photo Gallery). On the left is the photo straight out of the camera and on the right I’ve tweaked it a bit.
Check out the difference between the photo lit with flash, and the photo brightened on the computer. There is so much more depth and just overall improvement in the one on the right.
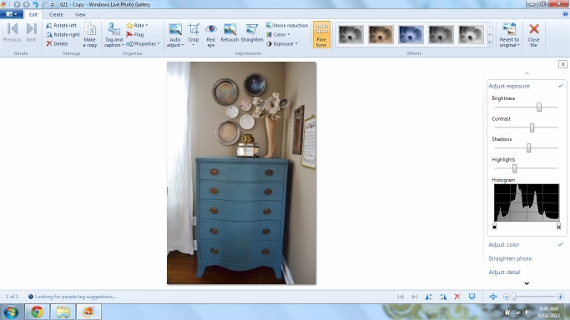
As for what I did, here’s a screenshot. I used the “fine tune” feature to up the brightness, increase the contrast and shadows just a smidge, and lower the highlights. I just play around until it looks good but most photos get a similar treatment. I also often increase the saturation by clicking on “adjust color”, but not for this photo.
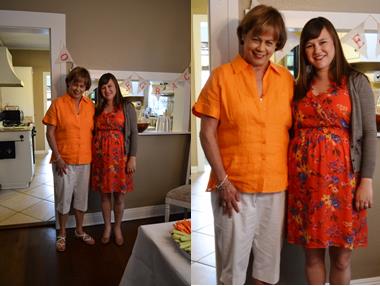
Now that we’ve got that under control, the next big frontier is embracing the crop. This is a photo that I took of my friend Cassie and her mom at the baby shower I hosted last spring. In addition to brightening it a smidge, I cropped it to get rid of all that wasted space around the perimeter and focus on the people. It’s an easy step that can really make a photo more frame-worthy.
Here are some more photos that I cropped from our visit to my sister’s baby goat. It’s a subtle change that can really make a difference. (btw these were both taken with an iPhone!)
And now for the final whammy–skipping flash, playing around with editing, and cropping to take a photo from “eh,” to “impressive!” (side note, you can read about how I got the cats into the picture here).
Big difference, right? And it takes maybe 1-2 minutes per photo (and of course turning the flash off takes no time at all). So, in summary:
- abolish the use of flash
- say yes to editing
- cropping is your friend
I hope you find these tricks as easy and helpful as I do! Like I said, I’m certainly no expert and I’m actually really lazy so if I can do it you can do it. Even a cell phone camera can churn out frame-worthy pics if you’ve got a few tricks up your sleeve!


Great post Charlotte! Sure to help lots of moms capture beautiful memories, without fancy equipment or very much hassle at all! Nice, simple ideas anyone can use!
Thanks, Beth!