Here at Red Stick Mom, we offer dozens of ideas from diverse perspectives in our mom hacks, tips and tricks category. Curious how to freshen up your skin routine? We suggest you try slugging. Looking for a faster way to fix your hair? Try the lazy mom’s guide to hair. Wondering if there’s a better way to cook bacon? Try this mom hack for cooking the best bacon ever and thank us later. What’s motherhood without perfecting your bacon, are we right? That’s the kind of content our Mom hacks, tips and tricks section highlights.
That said, not all of Red Stick Mom’s mom hacks, tips and tricks are about fixing food or mom’s self care. Maybe you are looking for a better way to store your family’s precious photo memories. Have you ever wondered what to do with the cupcakes that your kids inevitably didn’t finish? You haven’t really lived until you’ve tried “recycle cake.” We even get intimate with other topics like why every mom should try period panties and the value of a nursing cart when there’s a newborn in your home.
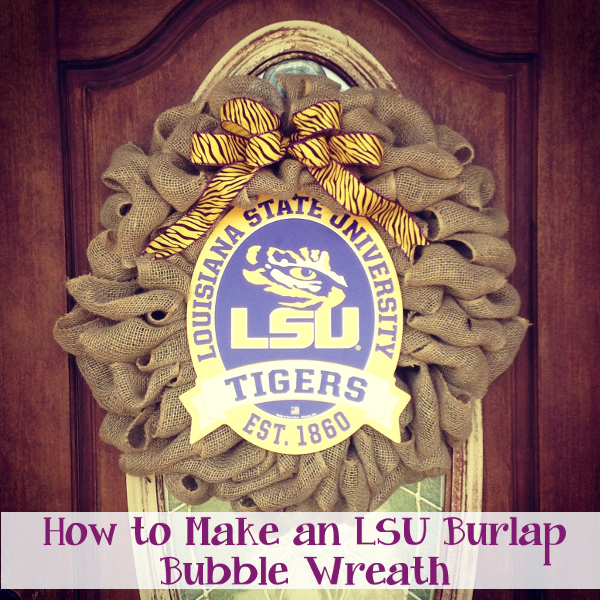
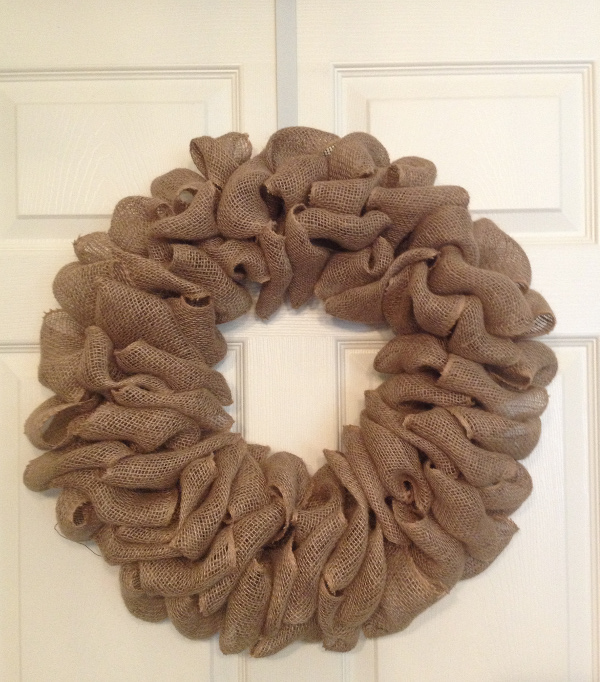
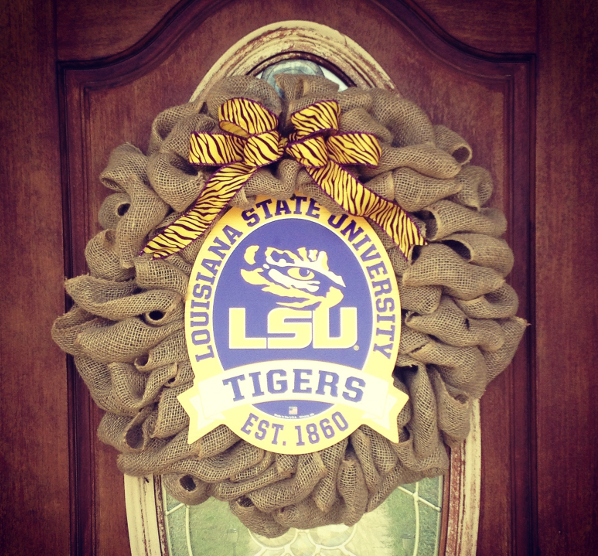
Being in Baton Rouge, it is no wonder that we have to create some sort of DIY around the LSU Tigers. This LSU Burlap Bubble Wreath is the perfect craft to celebrate the upcoming football season.
Celebrating the Fighting Tigers with an easy LSU Burlap Bubble Wreath.
Welp, it’s the time of the year that my husband lives for. Football season. I also enjoy a good football game, especially if my Tigers are playing in Death Valley on a beautiful Louisiana Saturday night, however my dear husband takes loving football, college football to be exact, to a whole new level! So, what better way to express his love of LSU and my love of burlap wreaths than to make an LSU burlap bubble wreath!?!?
Want to know how? It’s so super easy, keep reading….
1. MATERIALS
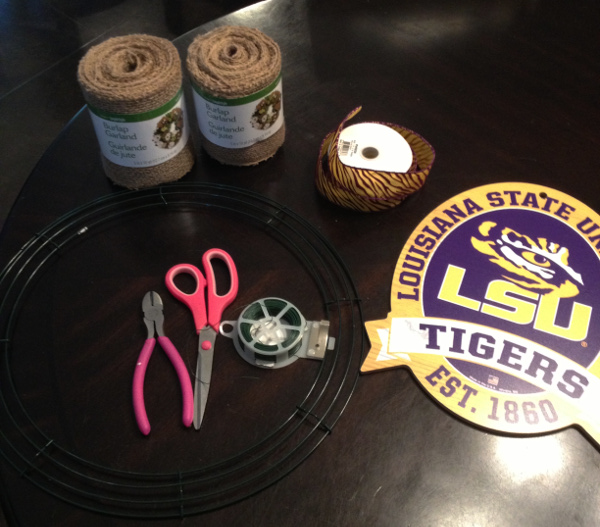
Collect your materials. I purchased everything in this picture from Wal-Mart (yes good ole Wally World) EXCEPT the Tiger ribbon (that came from my happy place Silks and Crafts in Denham Springs)! I spent a total of $25 on the burlap rolls, ribbon, centerpiece, and wreath form, everything else I had.
If you can’t find all of this at your local Walmart, you can hit up Hobby Lobby. You know they are all about their sales!
- 2 rolls of 5 inch (could easily be 6 inches) by 10 yards burlap.
- 1 roll of decorative WIRED ribbon. (Mine is only 1 inch wide, but you could most definitely use a larger one and you won’t use the whole roll by the way!)
- Wire wreath form
- Floral Wire
- Scissors and Wire Cutters
- LSU centerpiece (this jewel was only $12.99, wooden, and looks GREAT). Obviously you could use any football team centerpiece you fancy and it will still look great, well only if it isn’t Alabama.
2. BUBBLES
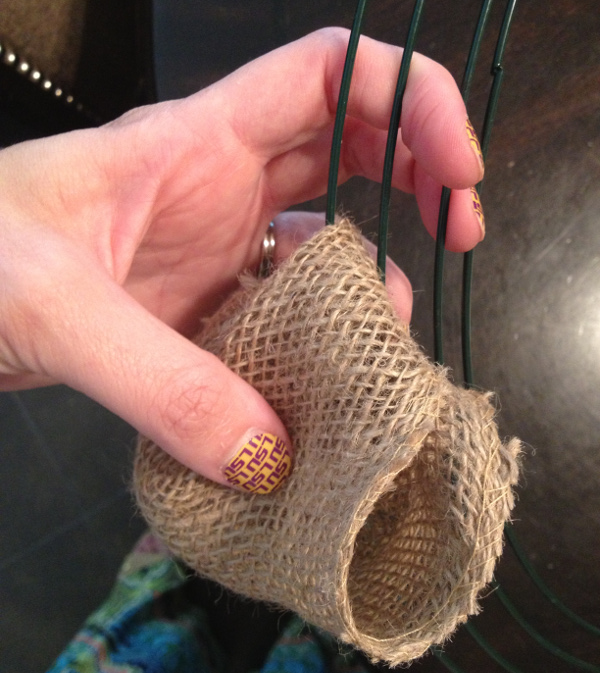
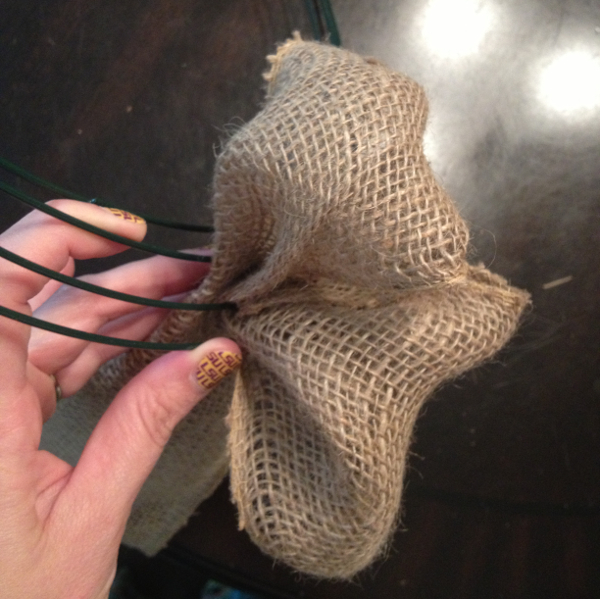
Secure the end of the burlap with a short piece of wire to the wreath form. Then push the burlap thru one of the sections from bottom up (I typically start on the outer ring, then middle, then inner ring) of the wreath form. Make sure to do the next “bubble” in the wire opening next to the one you just did to hold the previous loop in place. I did three rows of bubbles in each section of the wreath form, so all together if you keep going in that fashion (outer, middle, inner ring) three times in a section you’ll have approximately 72 bubbles. (I know, I know…I’m a tad obsessive compulsive.)
Your bubbles can be as large as you’d like (the bigger the better in my book-which will use all of your burlap) and don’t have to be exactly the same size by any means. This type of wreath hides mistakes well! Continue around the wreath until its as full as you’d like. I ran out of my first roll halfway through, so if this happens just connect the end of the first burlap roll with the second with wire and secure it to the form where you left off. Then cut off the burlap (if you have any left over) and secure the end with some wire like before.
3. CENTERPIECE
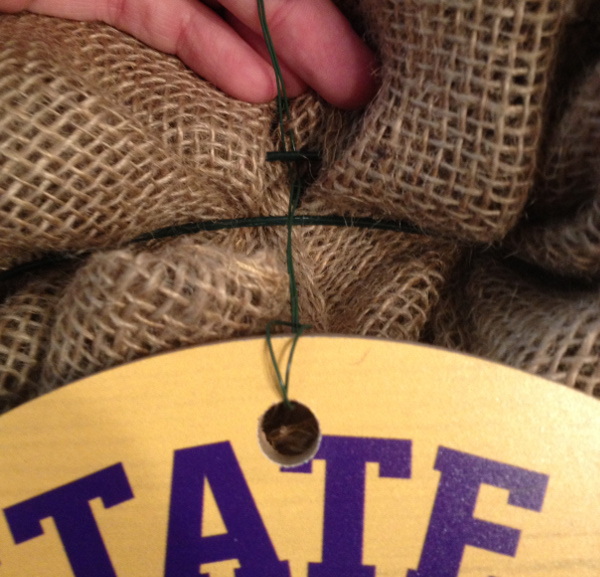
I love when the centerpieces I use for my wreaths have a hole already in it, luckily this baby did! Run your wire through the hole and place the centerpiece where you’d like it. Wrap the wire around the form in between the bubbles. The more you wrap or tie or twist that wire around the form the better!
4. THE BOW
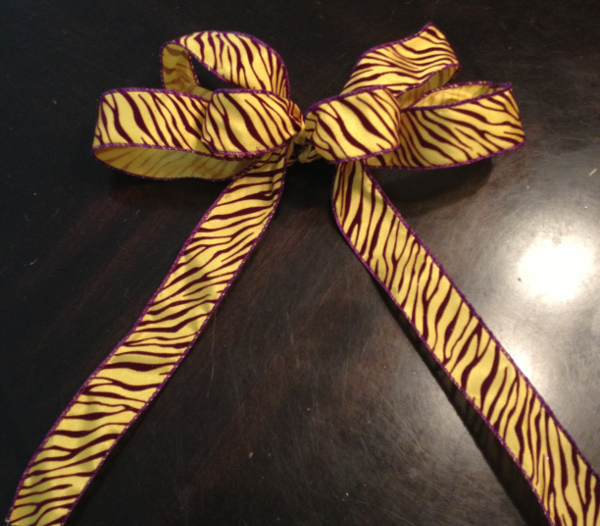
I admit, I’m not the best bow maker by ANY means. So when I found a “kinda” easy way to make a bow on YouTube, I was elated!! Tie your ribbon in a bow just like you tie your shoe, making sure you have about the same length on each side hanging down. Then with the loose ends hanging down, tie those again on top of your already made bow. You might need to fluff the “bunny ears” of the bow as you go. If you have enough ribbon hanging down, tie it a third time. Each time you tie it will stack on top of each other, you should only have to adjust the loops and make sure the extra ribbon hanging is in the correct place and even. String some wire through the back of the bow and secure the bow to the wreath form above your centerpiece.
5. TA-DA!
Step back, adjust any bubbles that look out of sorts, fluff your bow, and hang that burlap LSU Tiger goodness on your front door for all to see!!!
I’d love to know how you did making your wreath and I hope you enjoy it as much as I enjoy mine! Oh and one more thing, GEAUX TIGERS!!!


