


Cue the Christmas music and hang up your stockings, it is finally Christmas time y’all! With only weeks away from Santa’s arrival, we wanted to do something to inspire you to keep the little ones occupied. So, we bring you “12 Days of Christmas Crafts”. Much like the popular Christmas song, we will give to you a new Christmas craft idea for 12 consecutive days. The posts will include everything you need to know from ingredients to instructions to little tips. Let’s get right into it!
On the third day of Christmas, Red Stick Mom gave to me … salt dough Santa handprint ornaments,

DIY Christmas play dough bins,
and a contact paper Christmas tree activity.
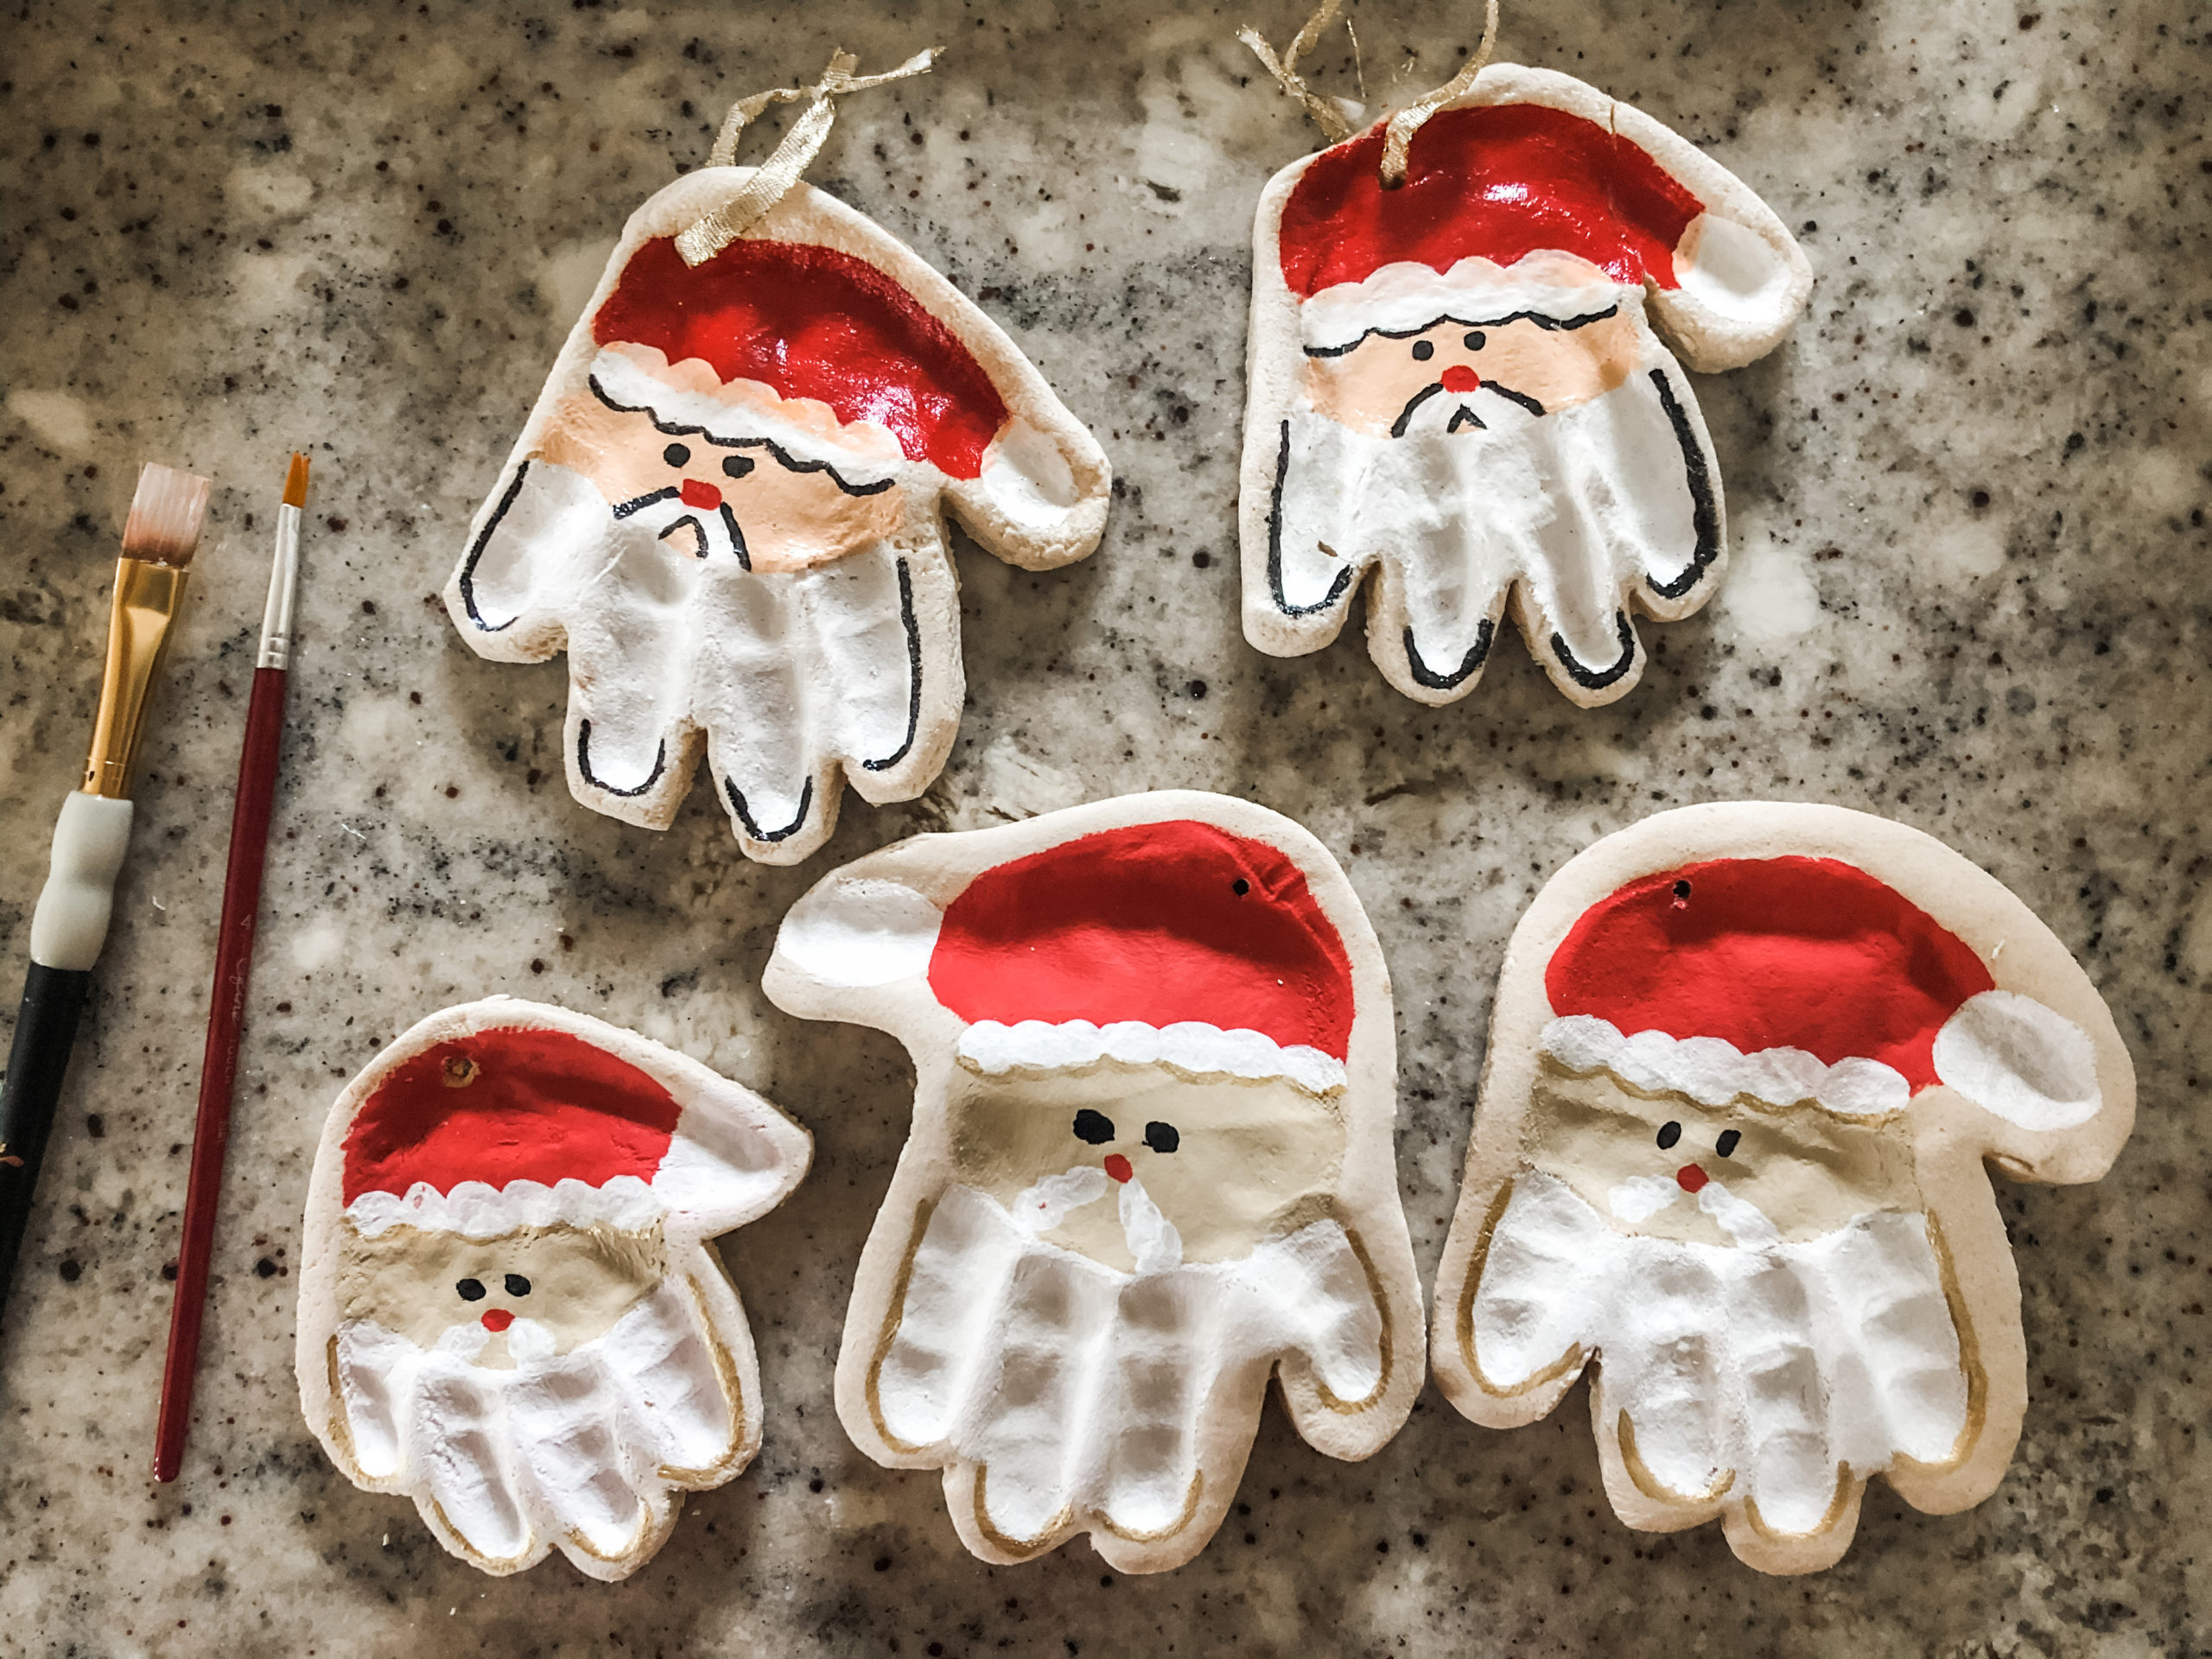
If you are looking for an inexpensive adorable keepsake, then I have just the craft for you! I am sure you’ve seen these cute little guys floating around before – salt dough Santa handprint ornaments. Now you can absolutely use the recipe to create any design but I will just be sharing the way we use the recipe every year. These ornaments are such an easy, precious way to enjoy those tiny hands year after year.
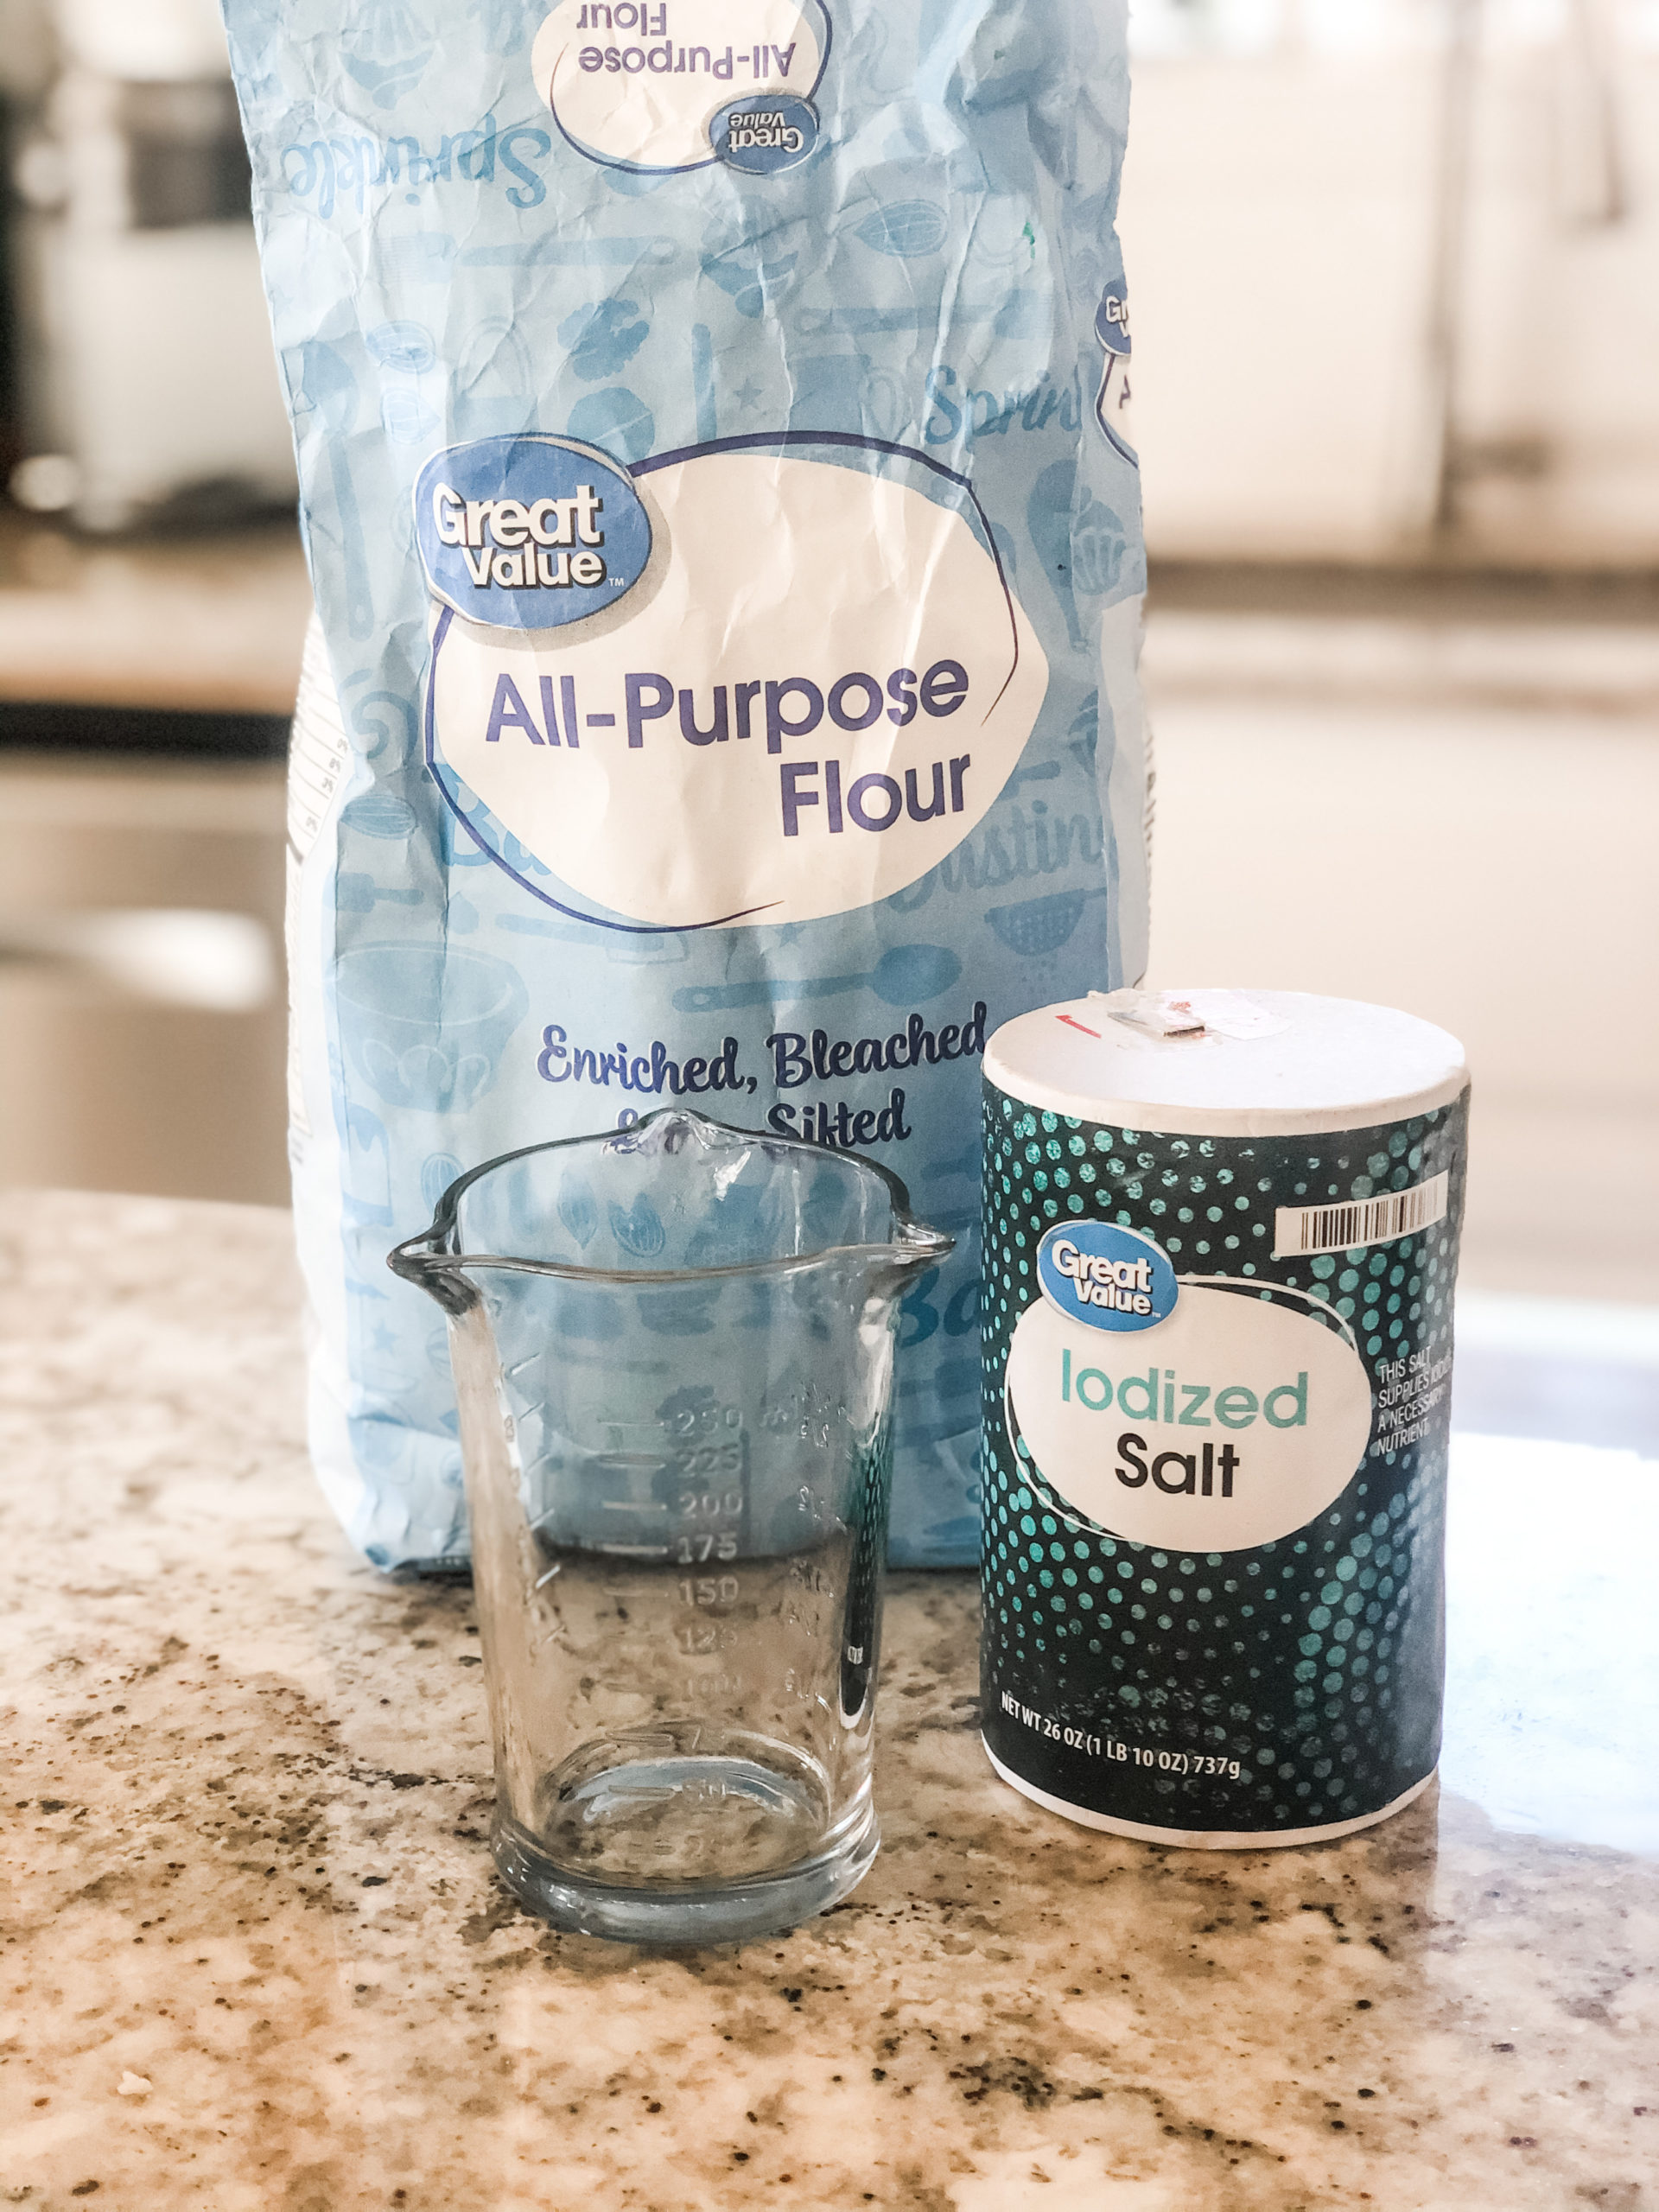
What you’ll need:
- ½ cup of flour
- ½ cup of salt
- ¼ cup of water
- Rolling pin or glass cup
- Straw
- Knife
- Paint brushes
- Acrylic paint- red, white, black, flesh tone, and gold
- Ribbon
- Mod Podge
How to:
The Ornament Dough
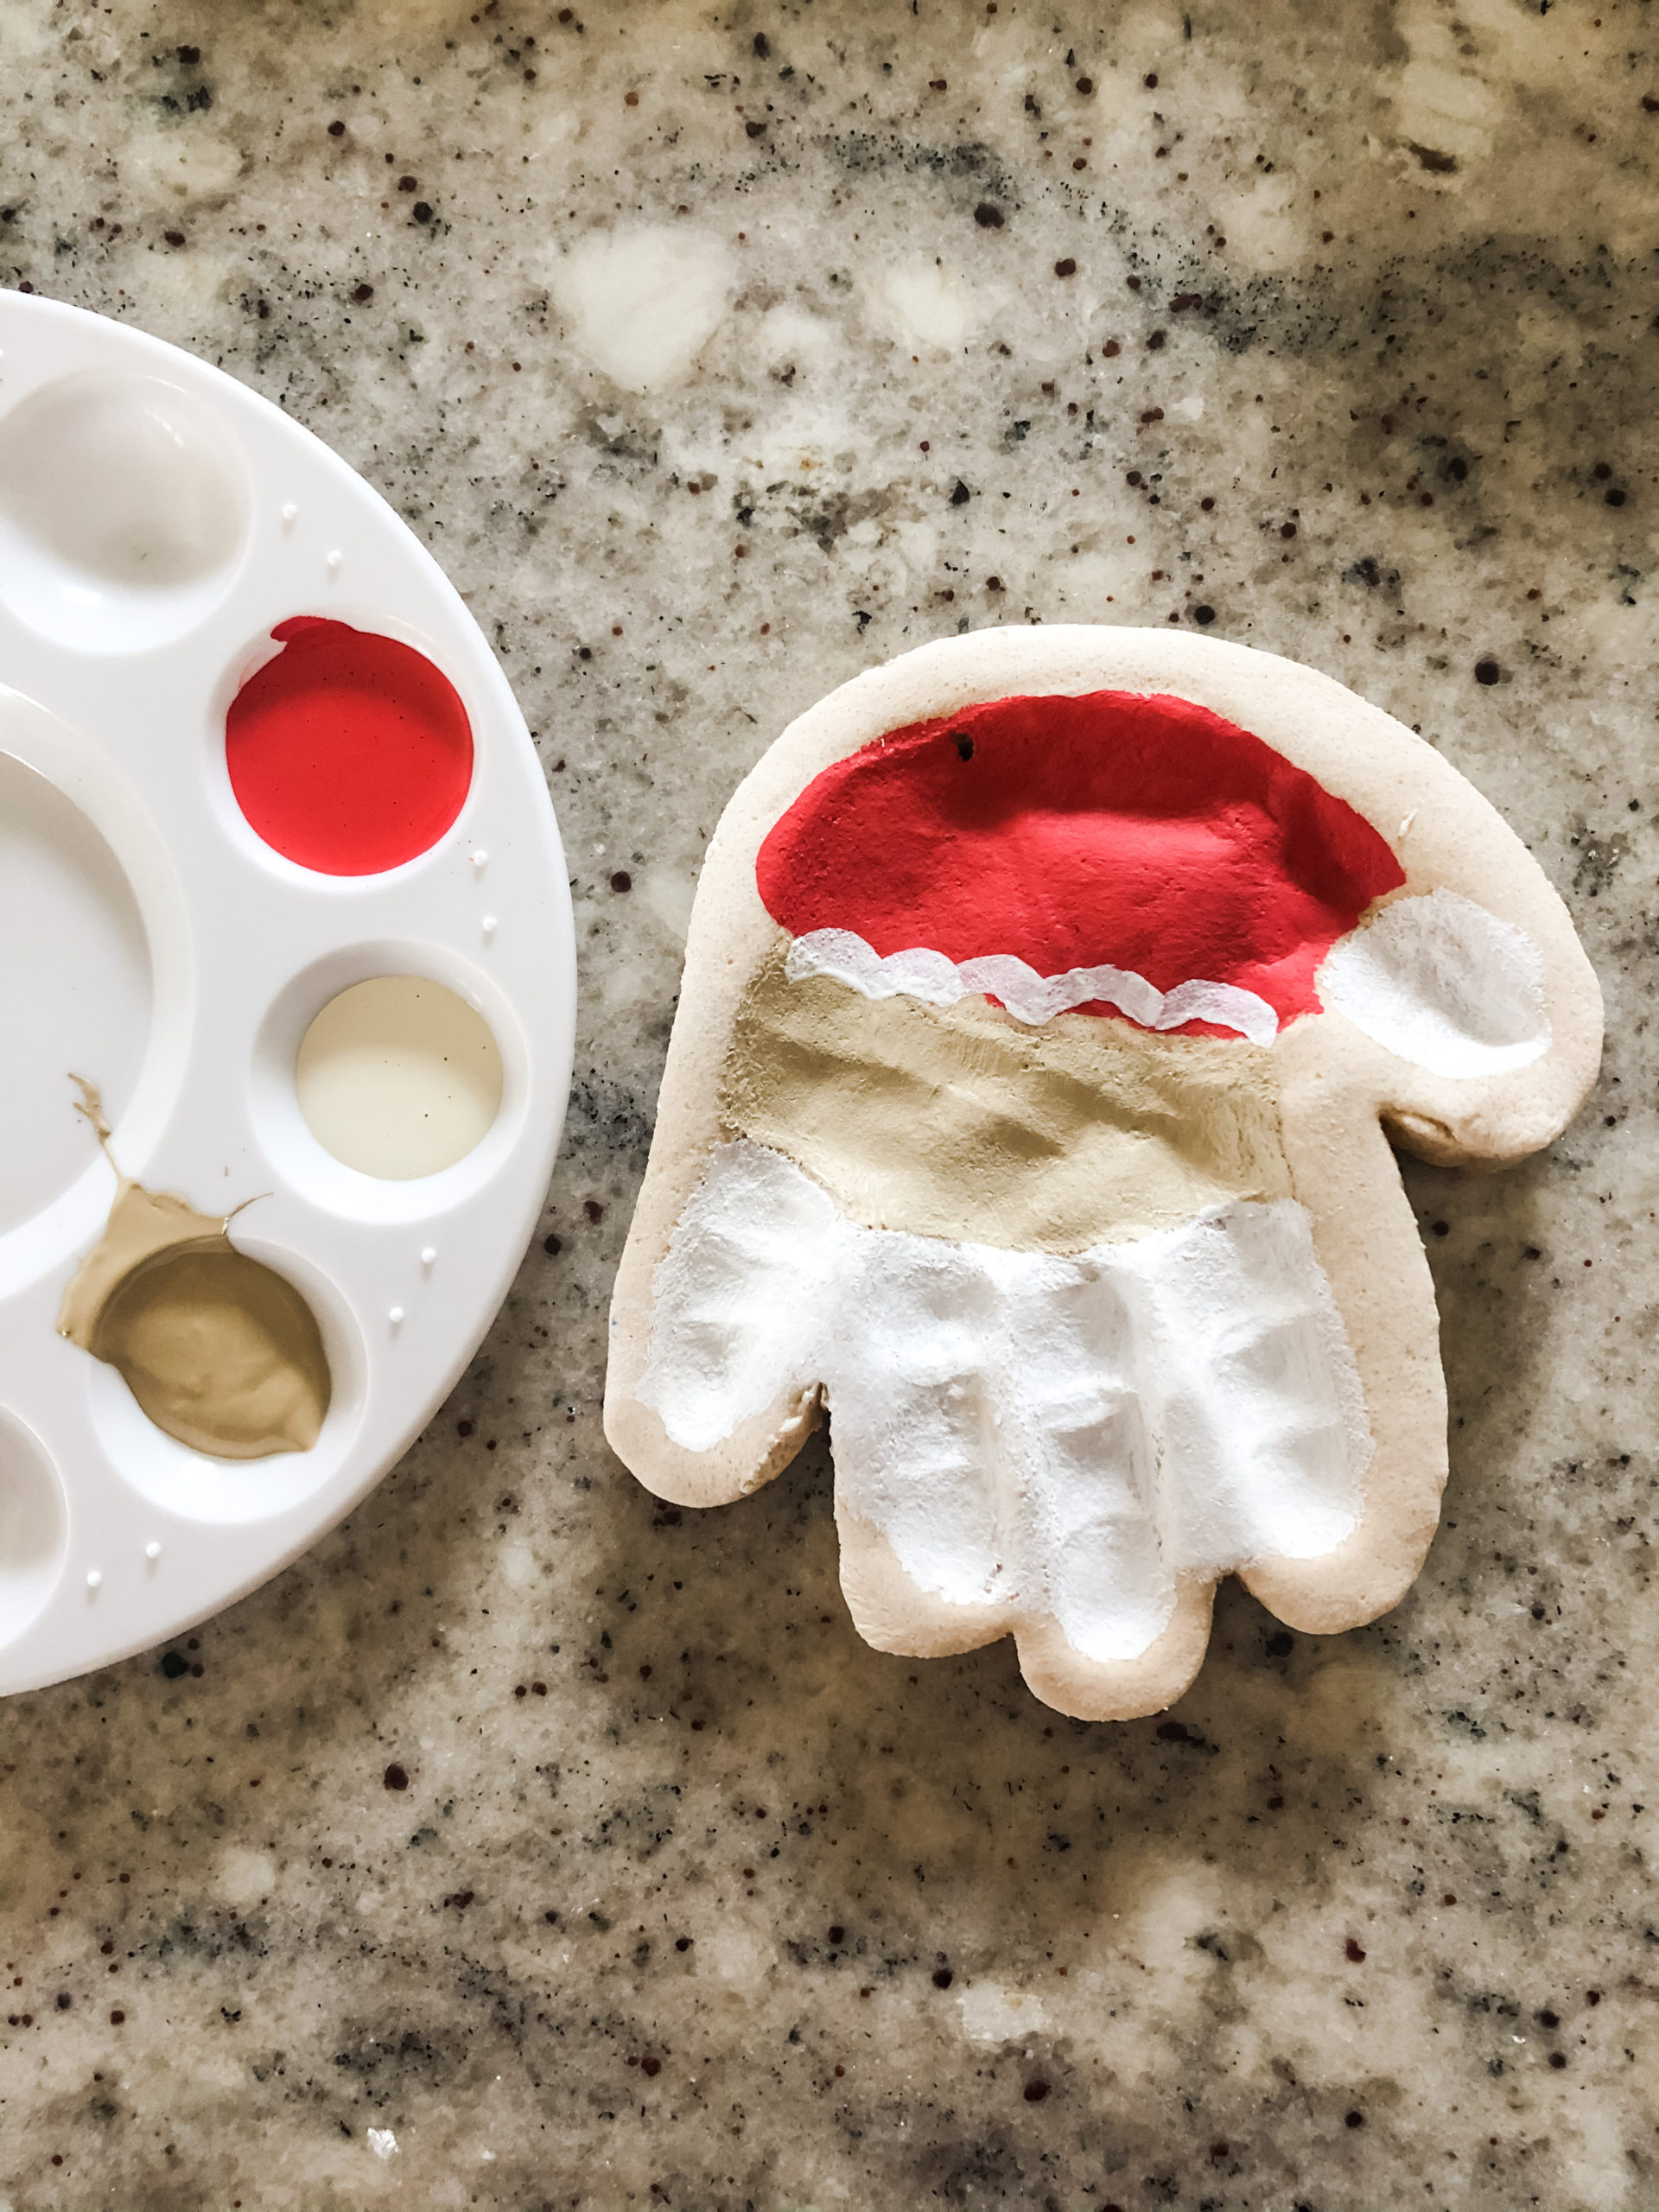
We’ll start with making the dough. Mix the flour and salt first then add the water. You’ll have to knead the dough with your hands to get it completely mixed. Sprinkle flour on the surface you’ll be rolling the dough on then roll out your dough. It will need to be much thicker than you think so it will last long and not crack easily. Gently press your child’s hand into the dough, rock the fingers back and forth to really get the impression onto the dough.
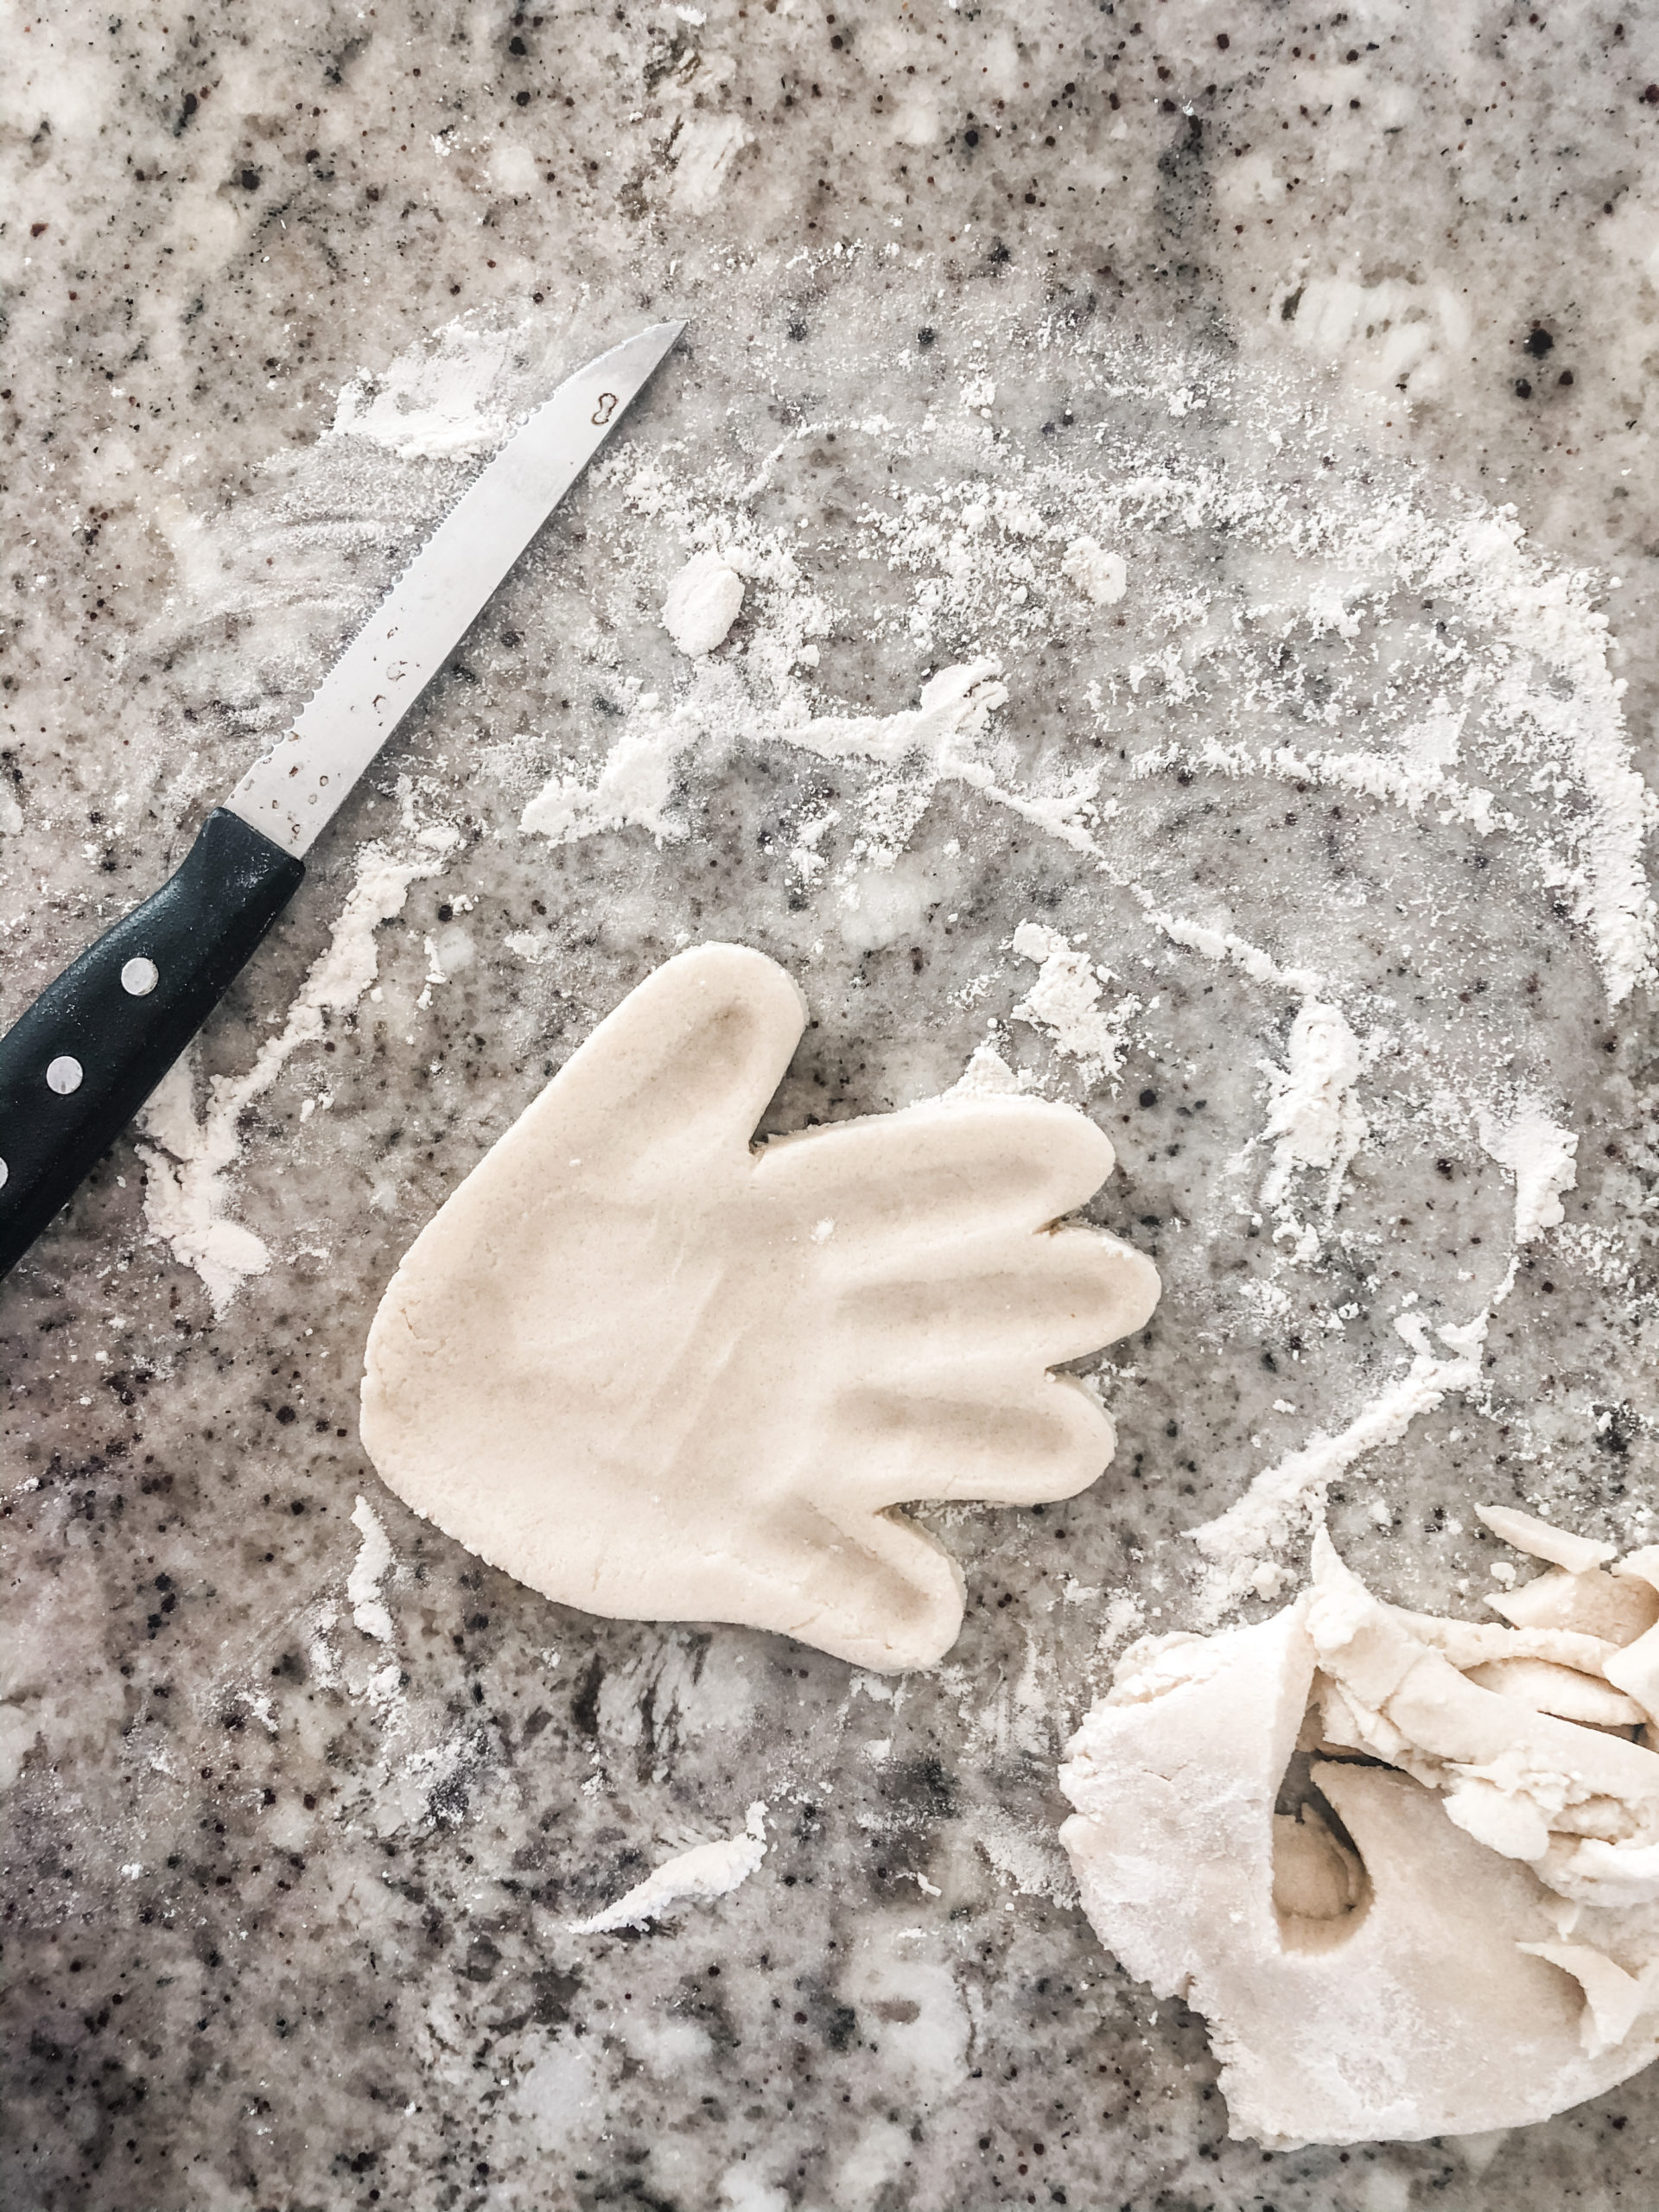
Now use a nice sharp knife to cut around the handprint. I like to leave a little lip around the edges, not cut super close to the handprint, but it’s up to you how much you leave. You can use the tip of the knife to clean the edges of the handprints.
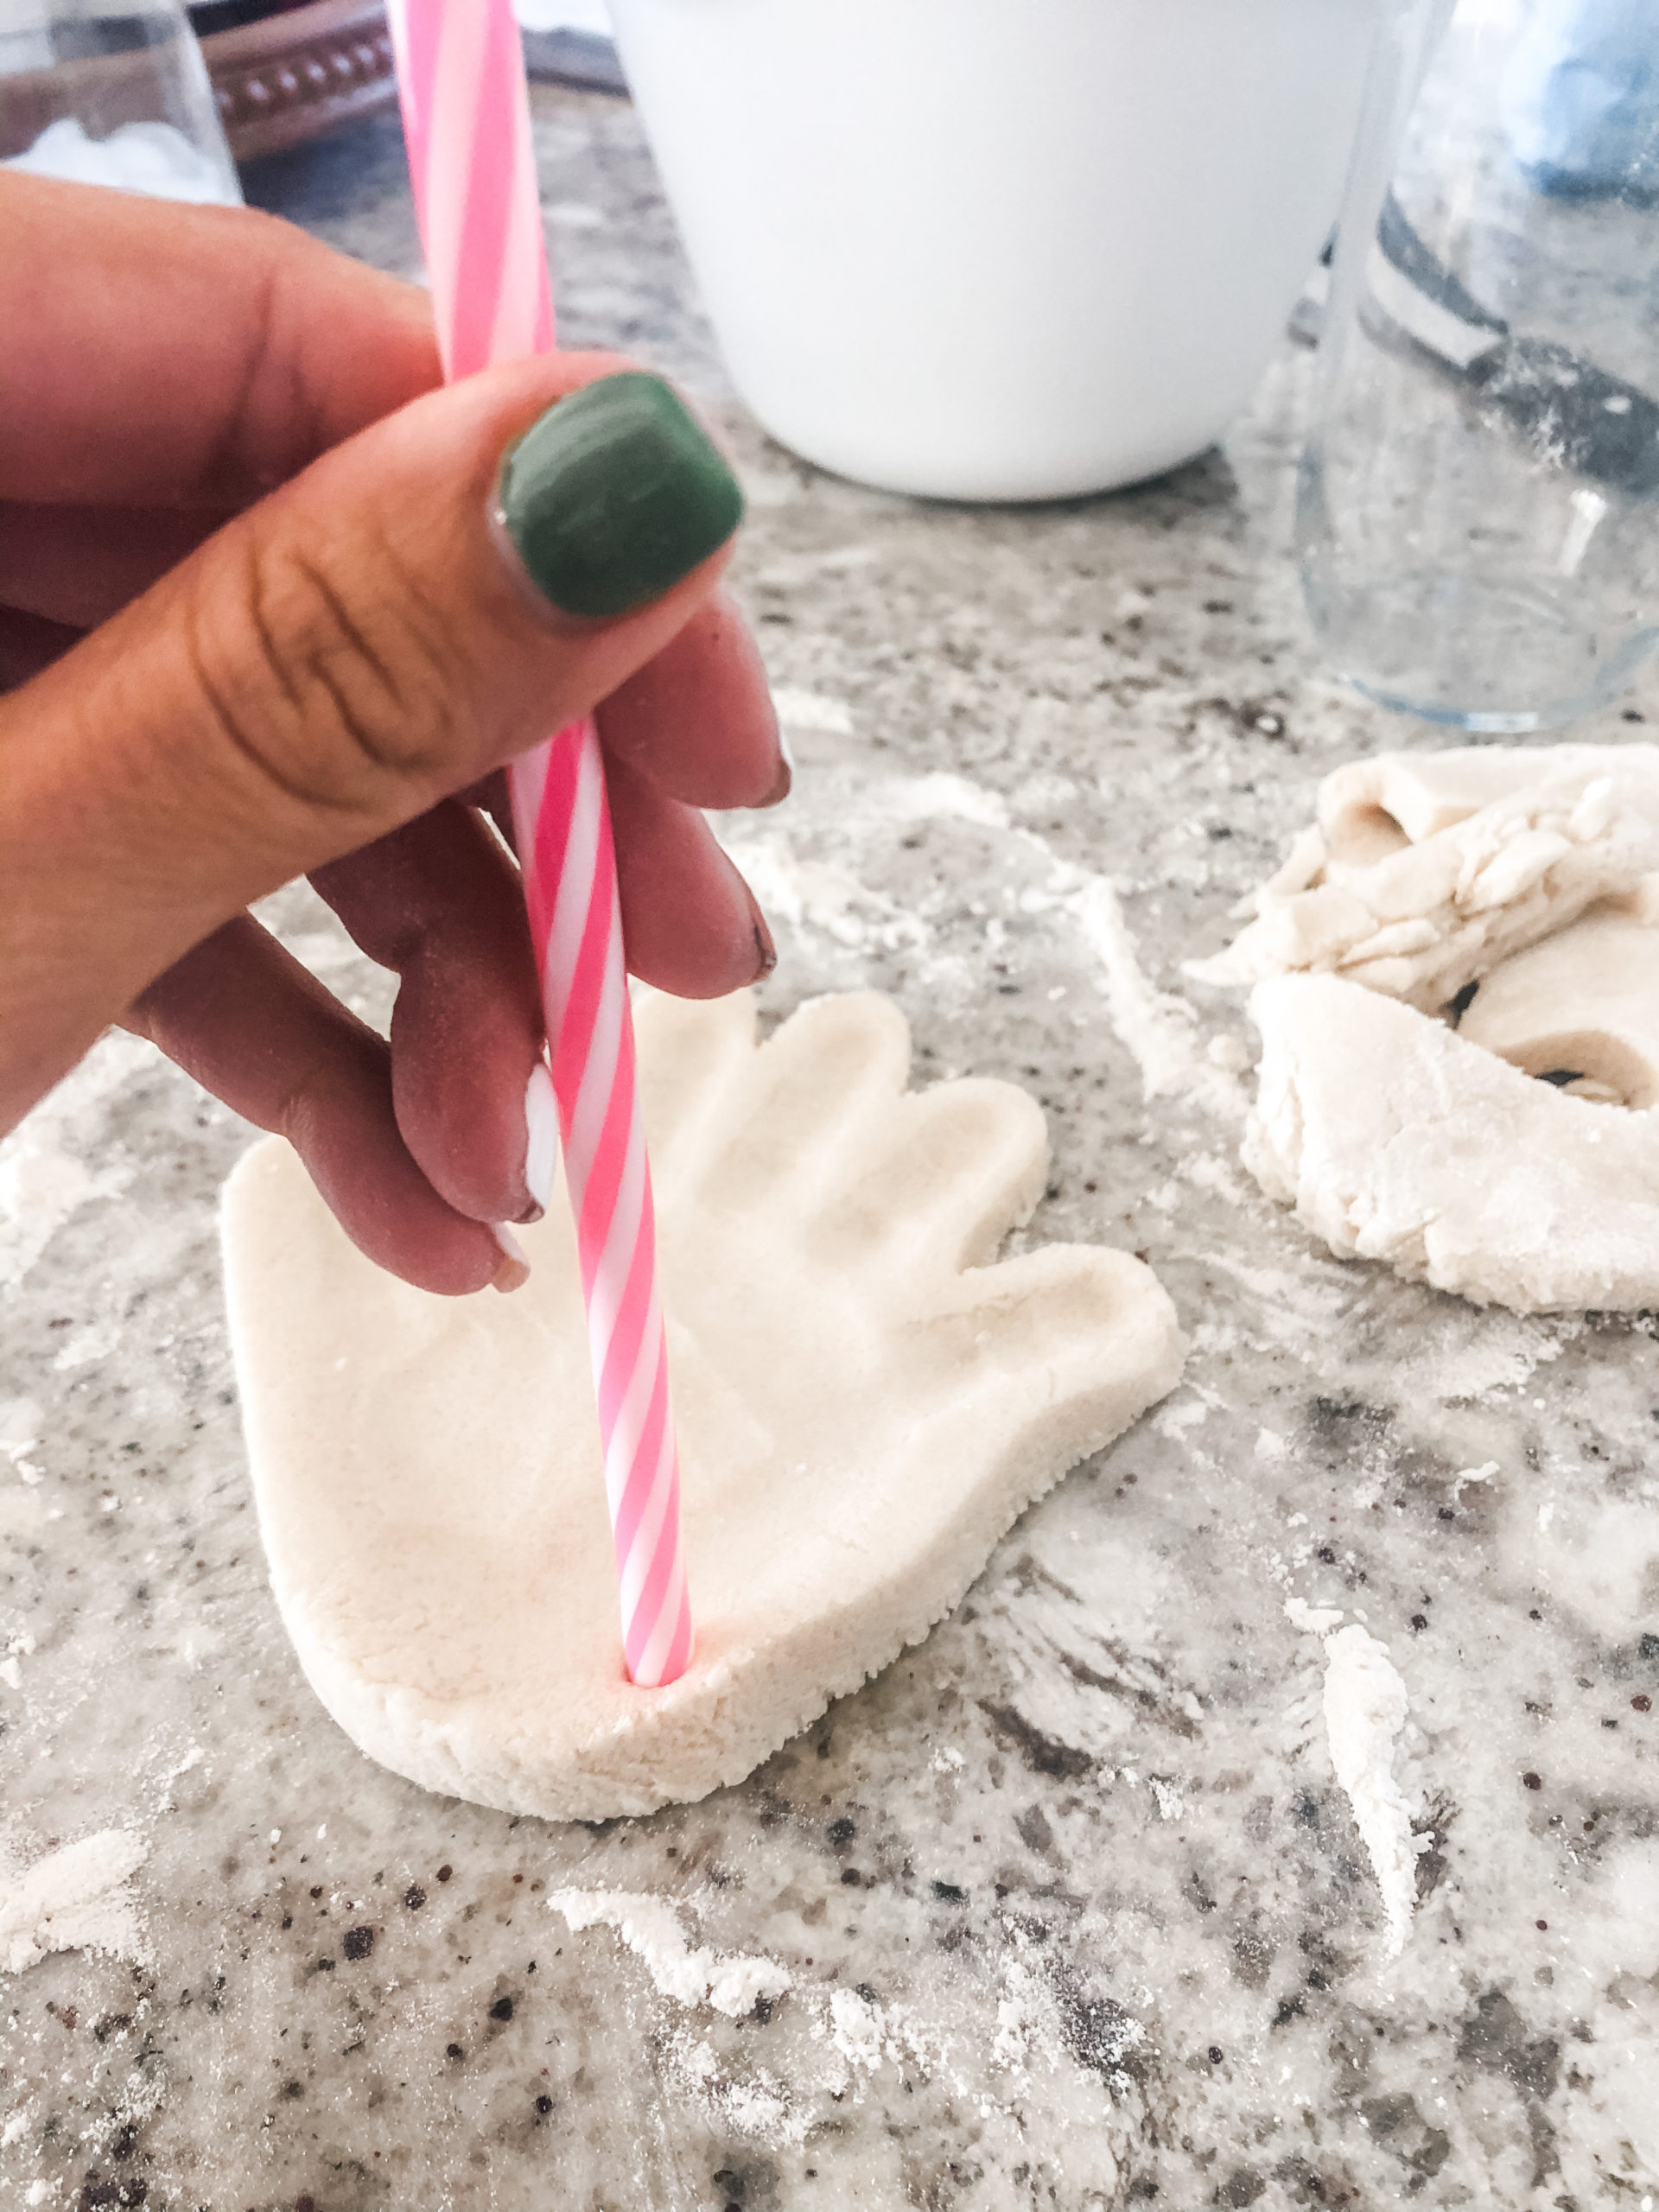
Using a straw, puncture a hole near the palm of the hand. This is where your ribbon will go later to hang. Once you get the ornament just how you want it, put it on a baking sheet and bake for 4 hours or so on 200 degrees. I say “or so” because the time varies from oven to oven.
Painting Santa
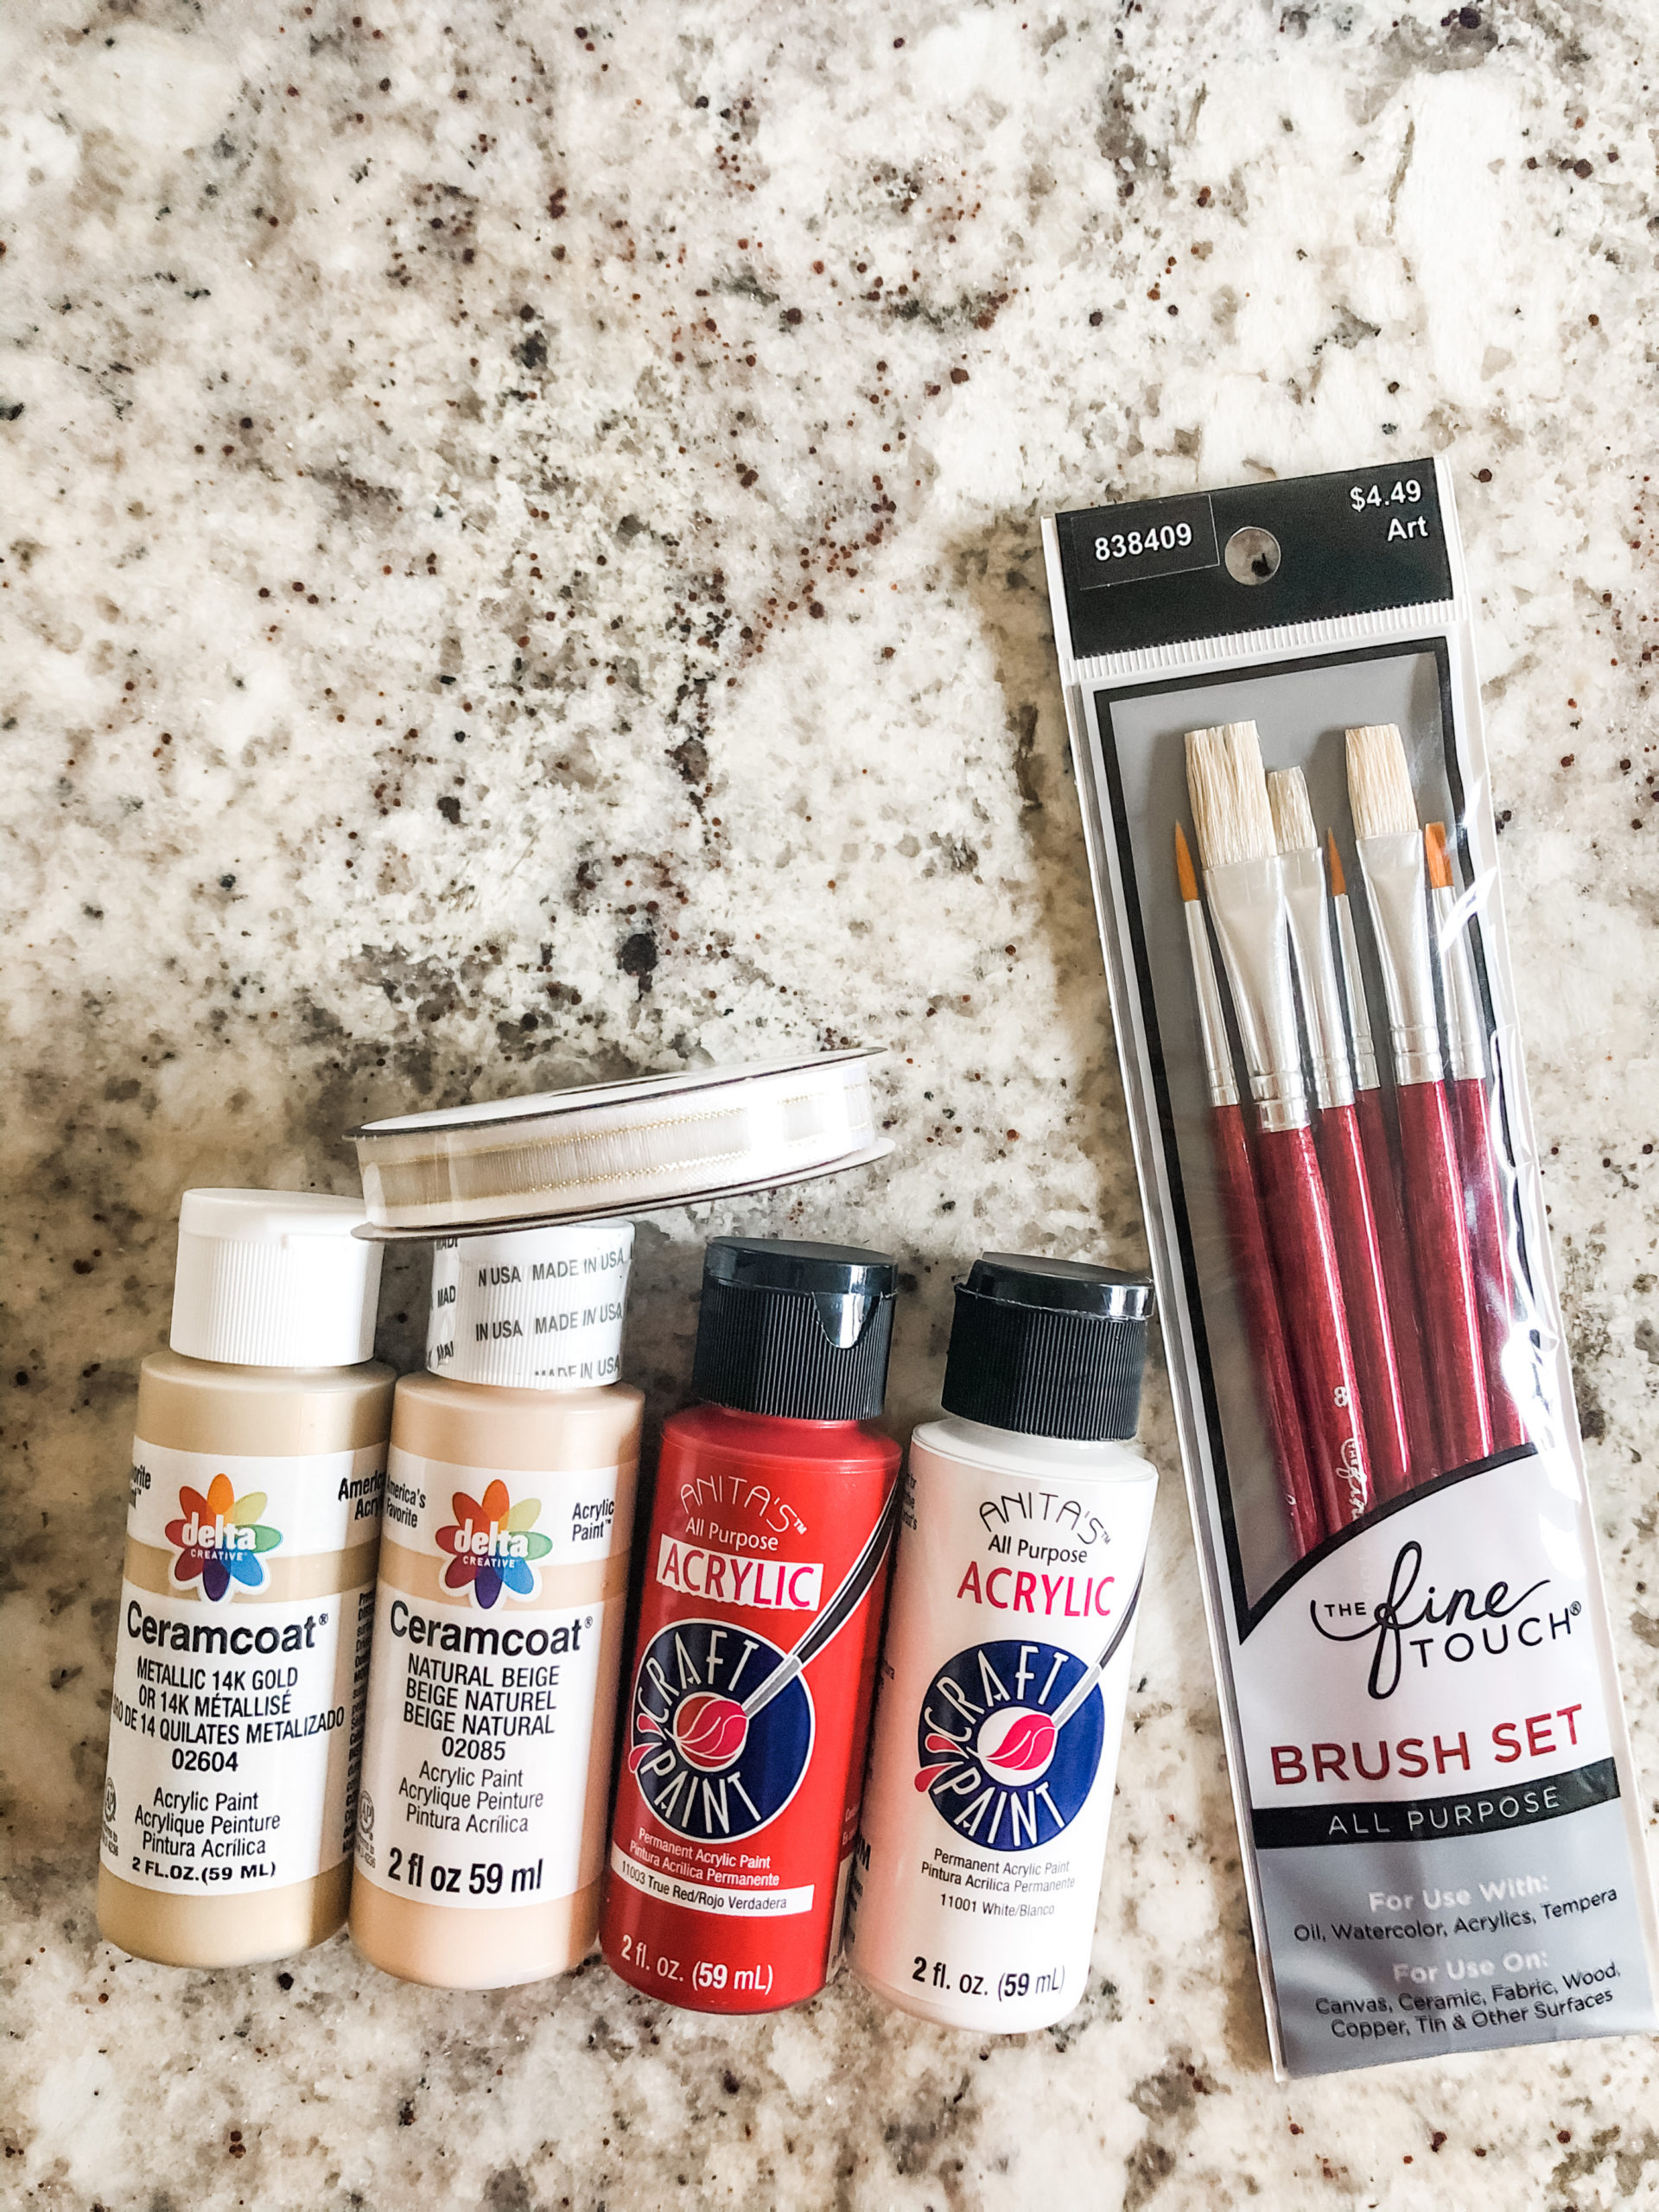
Now that is it finally out of the oven, give it some time to cool then you can begin painting.
- Paint all the fingertips white. Allow to dry before moving on.
- Using the flesh toned paint, paint from the fingertips to halfway up the palm. Leave room for the red Santa hat. Allow to dry before moving on.
- Create a Santa hat shape at the top of the hand using your red paint. Also, using red paint, add a nose. Allow to dry before moving on.

- Pull out the white paint again. Add some circles between the red paint and the flesh tone paint to create the fluff part of the Santa hat and Santa’s beard.
- You can use black paint or a sharpie to create the eyes and accent lines on your handprint. Follow the picture for where the suggested lines are.
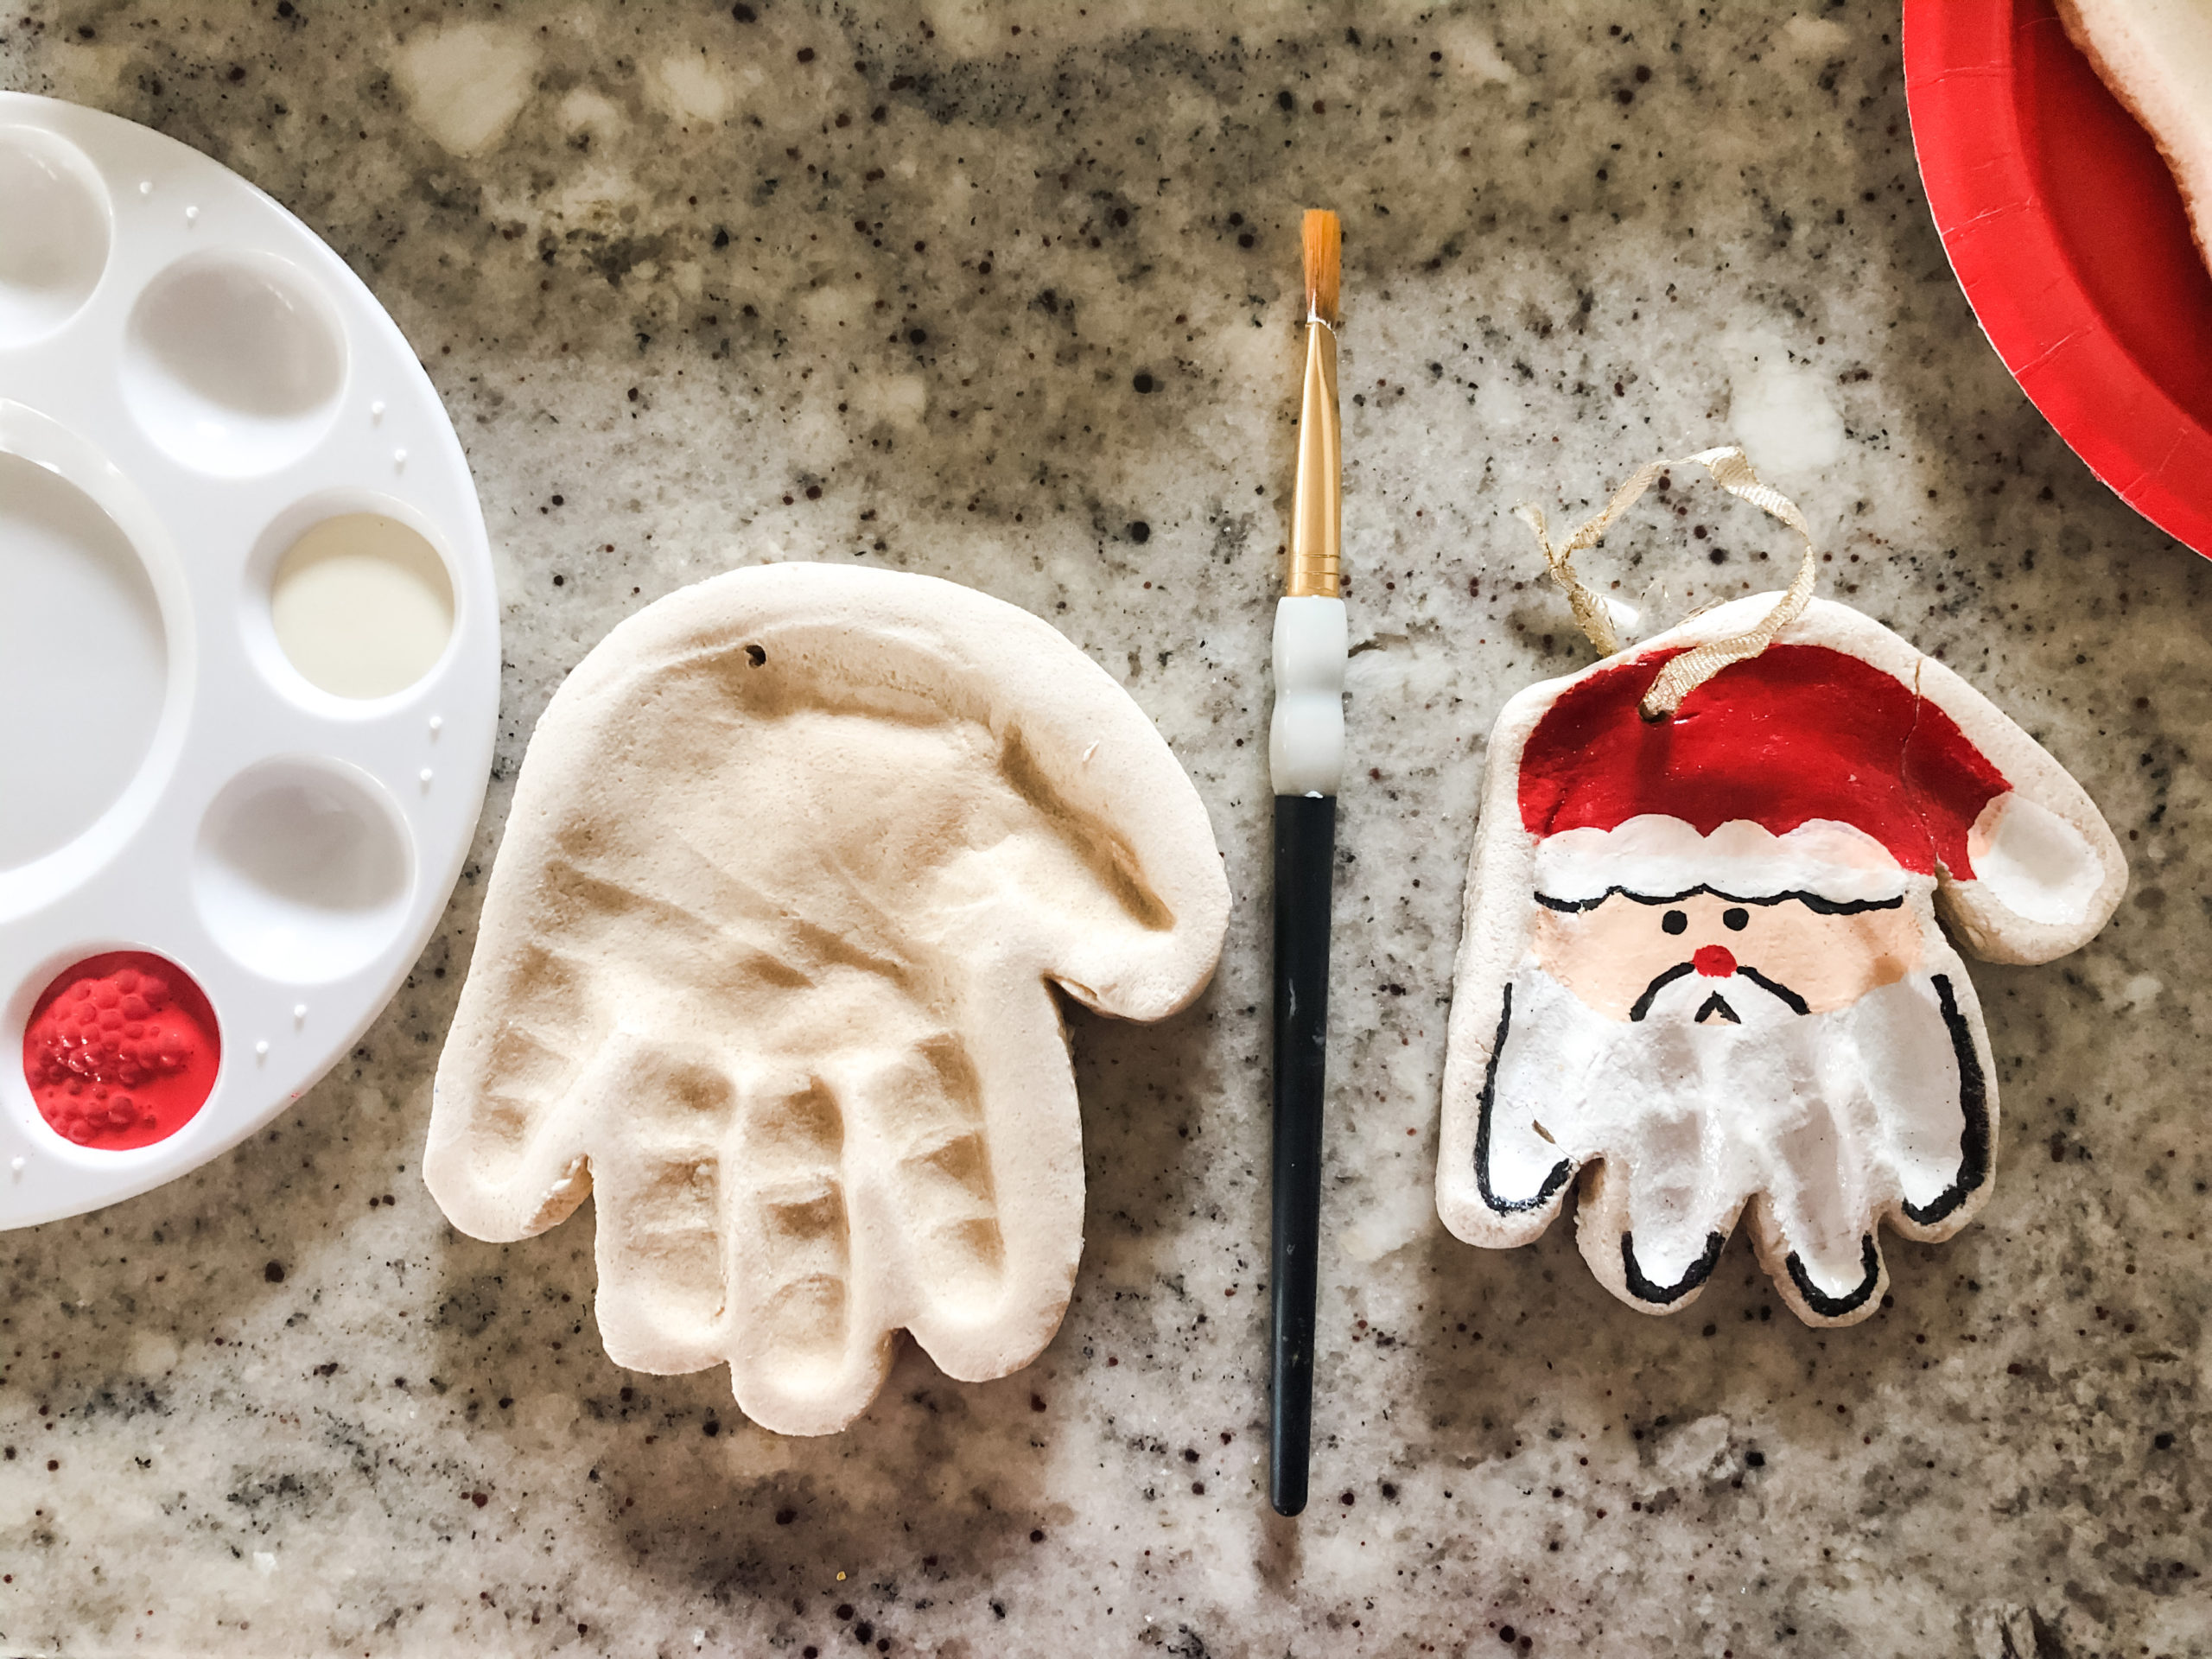
Once your paint is dry, come back over with a clean brush and add mod podge on top. Add your ribbon and you have a beautiful little keepsake. I can’t wait until they can paint their own ornaments in a few years but for now, I’ll just enjoy their chubby little hands and the comparison between sizes through the years.


